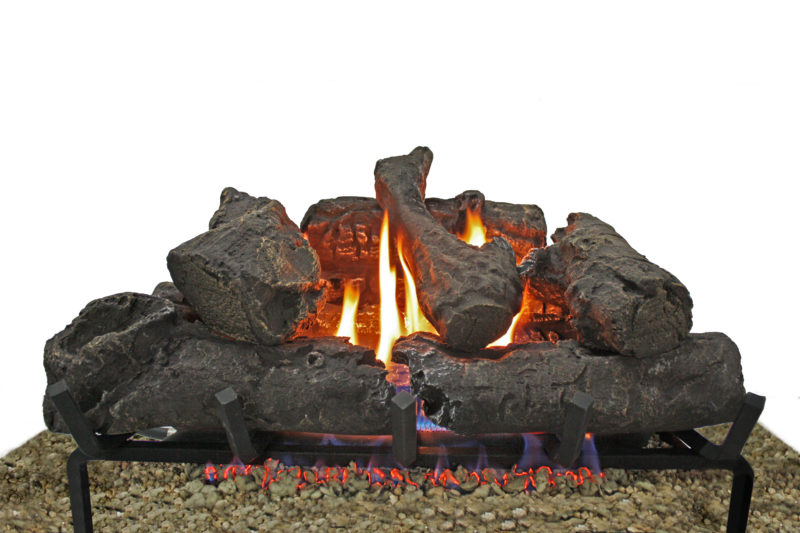
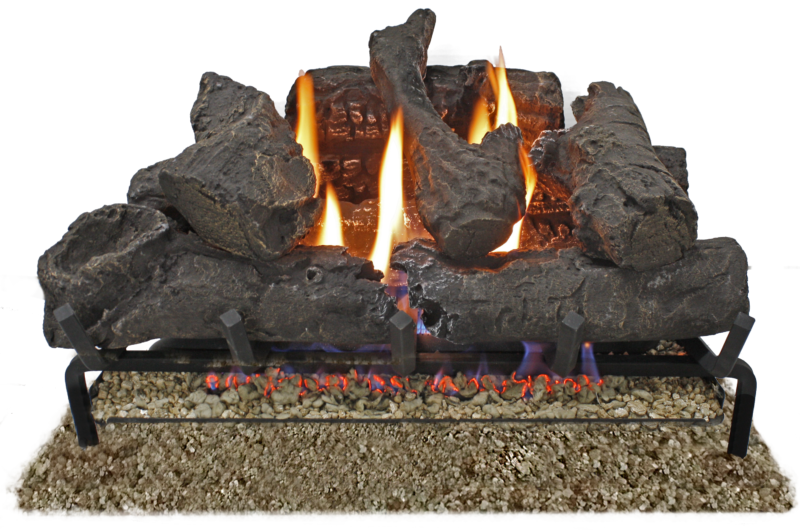
24” Vent-Free Gas Log


MODEL NUMBERS:
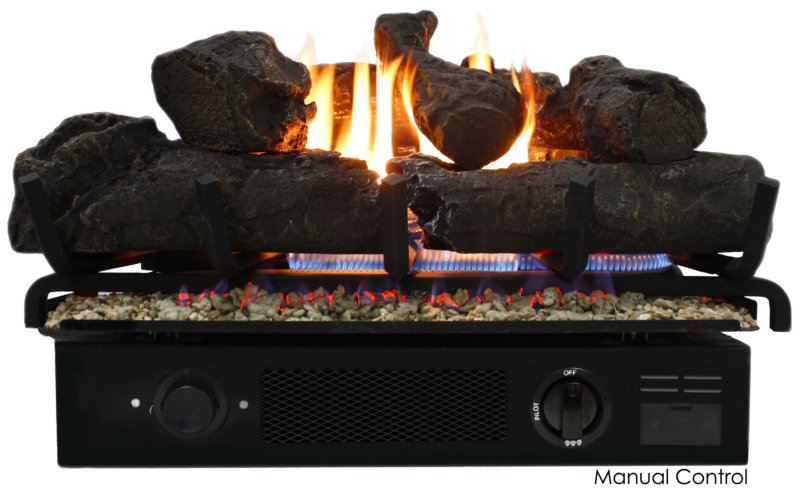
Manual Control
GLDF24M-VF (Dual Fuel)
GLN24M-VF (Natural Gas)
GLL24M-VF (Propane)
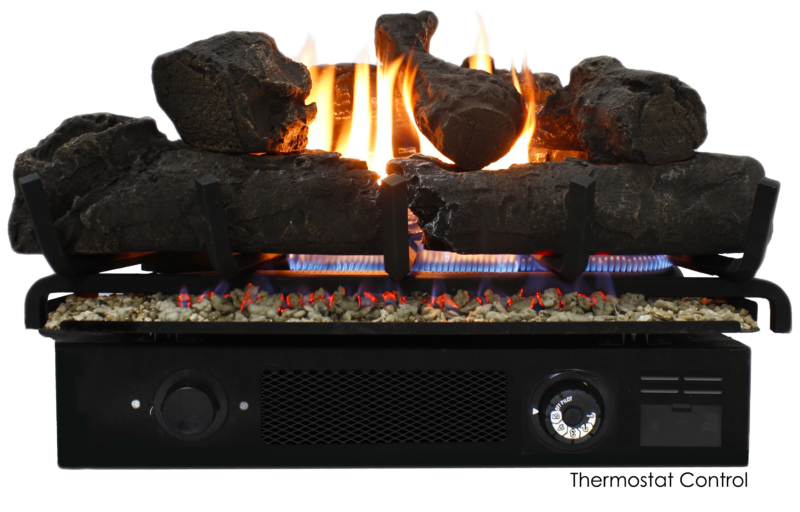
Thermostat Control
GLDF24T-VF (Dual Fuel)
GLN24T-VF (Natural Gas)
GLL24T-VF (Propane)
Remote Control
GLDF24R-VF (Dual Fuel)
GLN24R-VF (Natural Gas)
GLL24R-VF (Propane)
FUEL TYPE:
Natural Gas (NG) & Propane (LP)
MAXIMUM BTU:
40,000 BTU LP & NG
MINIMUM REQUIRED ROOM SIZE: 1,150 square feet.
GAS CONSUMPTION:
Propane: 2.24 Lbs/Hour
Propane: 0.38 Gallons/Hour
Natural Gas: 47 ft3/Hour
PRODUCT DIMENSIONS:
24 inches (Width)
16 inches (Height)
16 inches (Depth)
PRODUCT WEIGHT: 38.93 lbs
SHIP WEIGHT: 46.30 lbs
AVAILABLE AT:

PRODUCT FEATURES
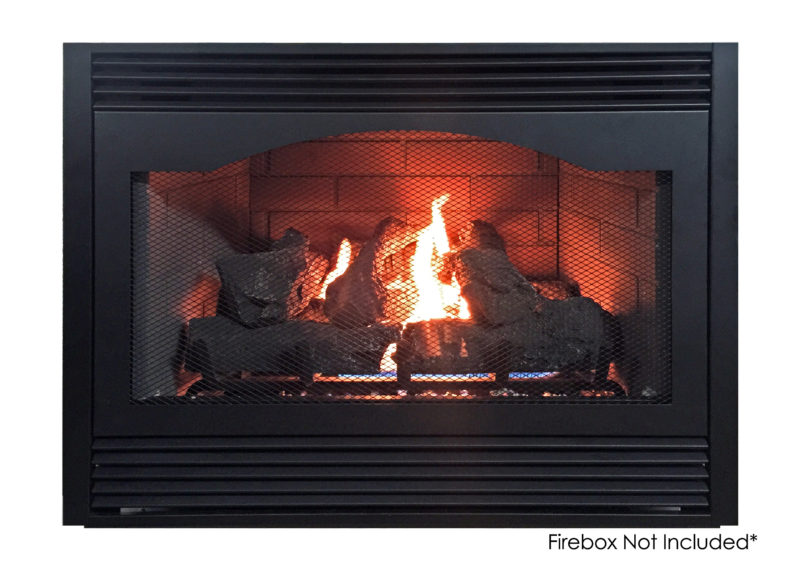
Transform your existing wood-burning fireplace in to a real flame gas-fueled fireplace and never worry about hauling wood, messy ashes or soot again. This heater comes with the most realistic natural fire and highly detailed logs that glow like real wood. Comes with seven ceramic logs, adding a realistic appearance to the high end appeal of the heater. The 24″ Vent Free 40,000 BTU Gas Log heater is perfect for rooms of 1,150 square feet or more. This vent free unit requires no electricity, making it a great alternate heat source during power failures, while being energy efficient at all times. The dual fuel version of this heater allows the professional installer to set up the unit for either propane or natural gas, with no manual switching required. Available in single fuel in some markets.
PRODUCT FEATURES
- SAFETY PILOT
Equipped with an Oxygen Depletion Sensing (ODS) safety shutoff system. The ODS/pilot shuts off the heater if there is not enough fresh air.
- AUTOMATIC IGNITION SYSTEM
This heater is equipped with a PCB controlled automatic ignition system. No AC power supply required. Battery should be periodically checked and replaced accordingly.
- GAS OPTIONS CAPABLE (Dual Fuel Models Only) (Models that start with GLDF)
If you have the dual fuel model, your heater is equipped to operate on either propane or natural gas. It will automatically identify your gas source without any manual changes, so no switching is necessary.
- GAS Connection
Our gas logs have a built in regulator with a 3/8 inch male flare that requires a 3/8 inch female UNF connection to a 1/2 inch gas flex hose. The flex hose should be connected to a MINIMUM ½ inch gas line to ensure proper pressure. You must have a shut off valve installed on the gas line near the heater. Click HERE to purchase a kit that will provide the flex hose, fittings, and shut off valve all in one.
RECHARGING SYSTEM & BATTERIES
Our remote control gas logs will automatically recharge the batteries using the flame. If the batteries are dead please follow the following procedure:
You will need to use a Micro USB cable and plug it into the Micro USB Port on the front panel of the unit. (Most of electronic devices that are not an iPhone work with this cable so you might have one at home.)
After you connect the Micro USB cable, leave it plugged in for 15 min and try to ignite the unit again by pressing the power button. This unit is equipped with an auto sustainable system that will automatically start charging the batteries using the flame.
If you need replacement batteries please click here to purchase:
**Do not replace the batteries with regular AA batteries because the heater will not work. The batteries that came with it are 3.7 Volts rechargeable batteries, regular AA batteries are 1.6 volts.**
PROFESSIONAL INSTALLATION REQUIRED
Only a professional should install and replace gas piping, gas utilization equipment or accessories, repair and service the heater. The term “qualified agency” means any individual, firm, corporation, or company that either in person or through a representative is engaged in and is responsible for:
a) Installing, testing, or replacing gas piping or
b) Connecting, installing, testing, repairing, or servicing equipment; that is experienced in such work; that is familiar with all precautions required; and that has complied with all the requirement of the authority having jurisdiction.
We at Reecon strive to produce the highest quality Thermablaster heaters to warm our customers. We feel that a heater should look as good as it operates and work without a fuss. That is why we have developed our patent pending dual fuel heating system, which allows the use of either liquid propane or natural gas for some of our most popular products, without requiring any adjustments. Our product lines consist of vent free gas wall heaters, a direct vent gas wall heater line, kerosene and propane forced air heaters, electric industrial heaters, fireplace sets, as well as outdoor heating products. Through our innovative product design and customer first mentality, we strive to provide the best heaters for all needs, at a price that won’t break the bank.
REPLACEMENT PARTS
Please click HERE to order replacement parts for your heater. Please note your model number, serial number, and contact information in your request.
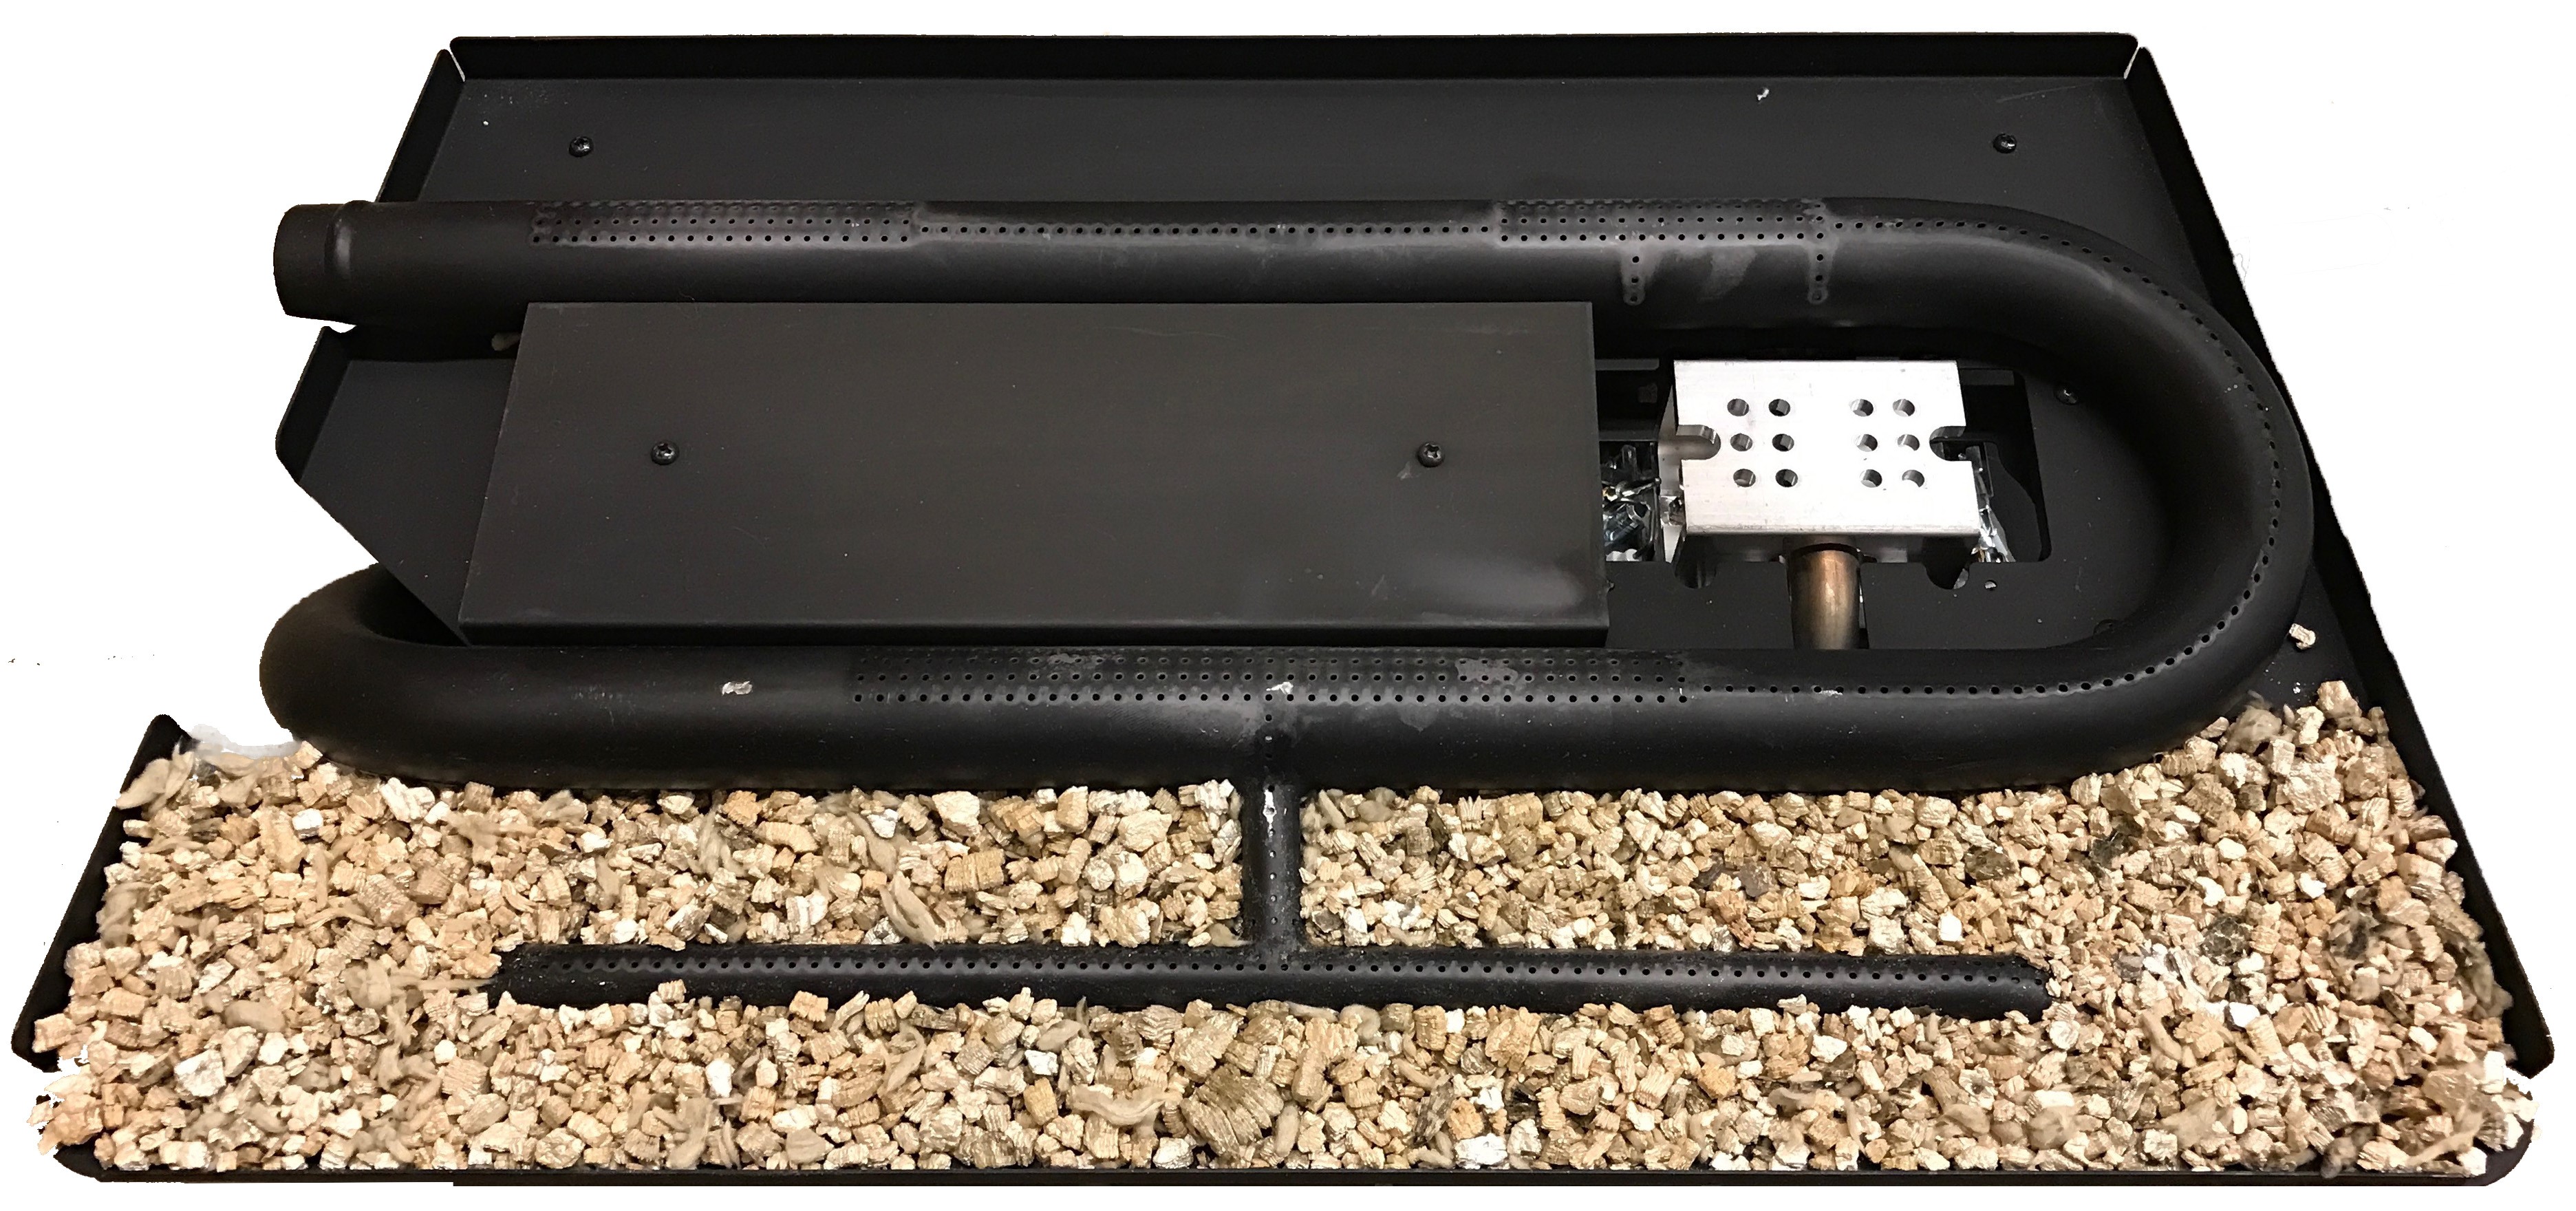
Placement of Glowing Ember and Stones.
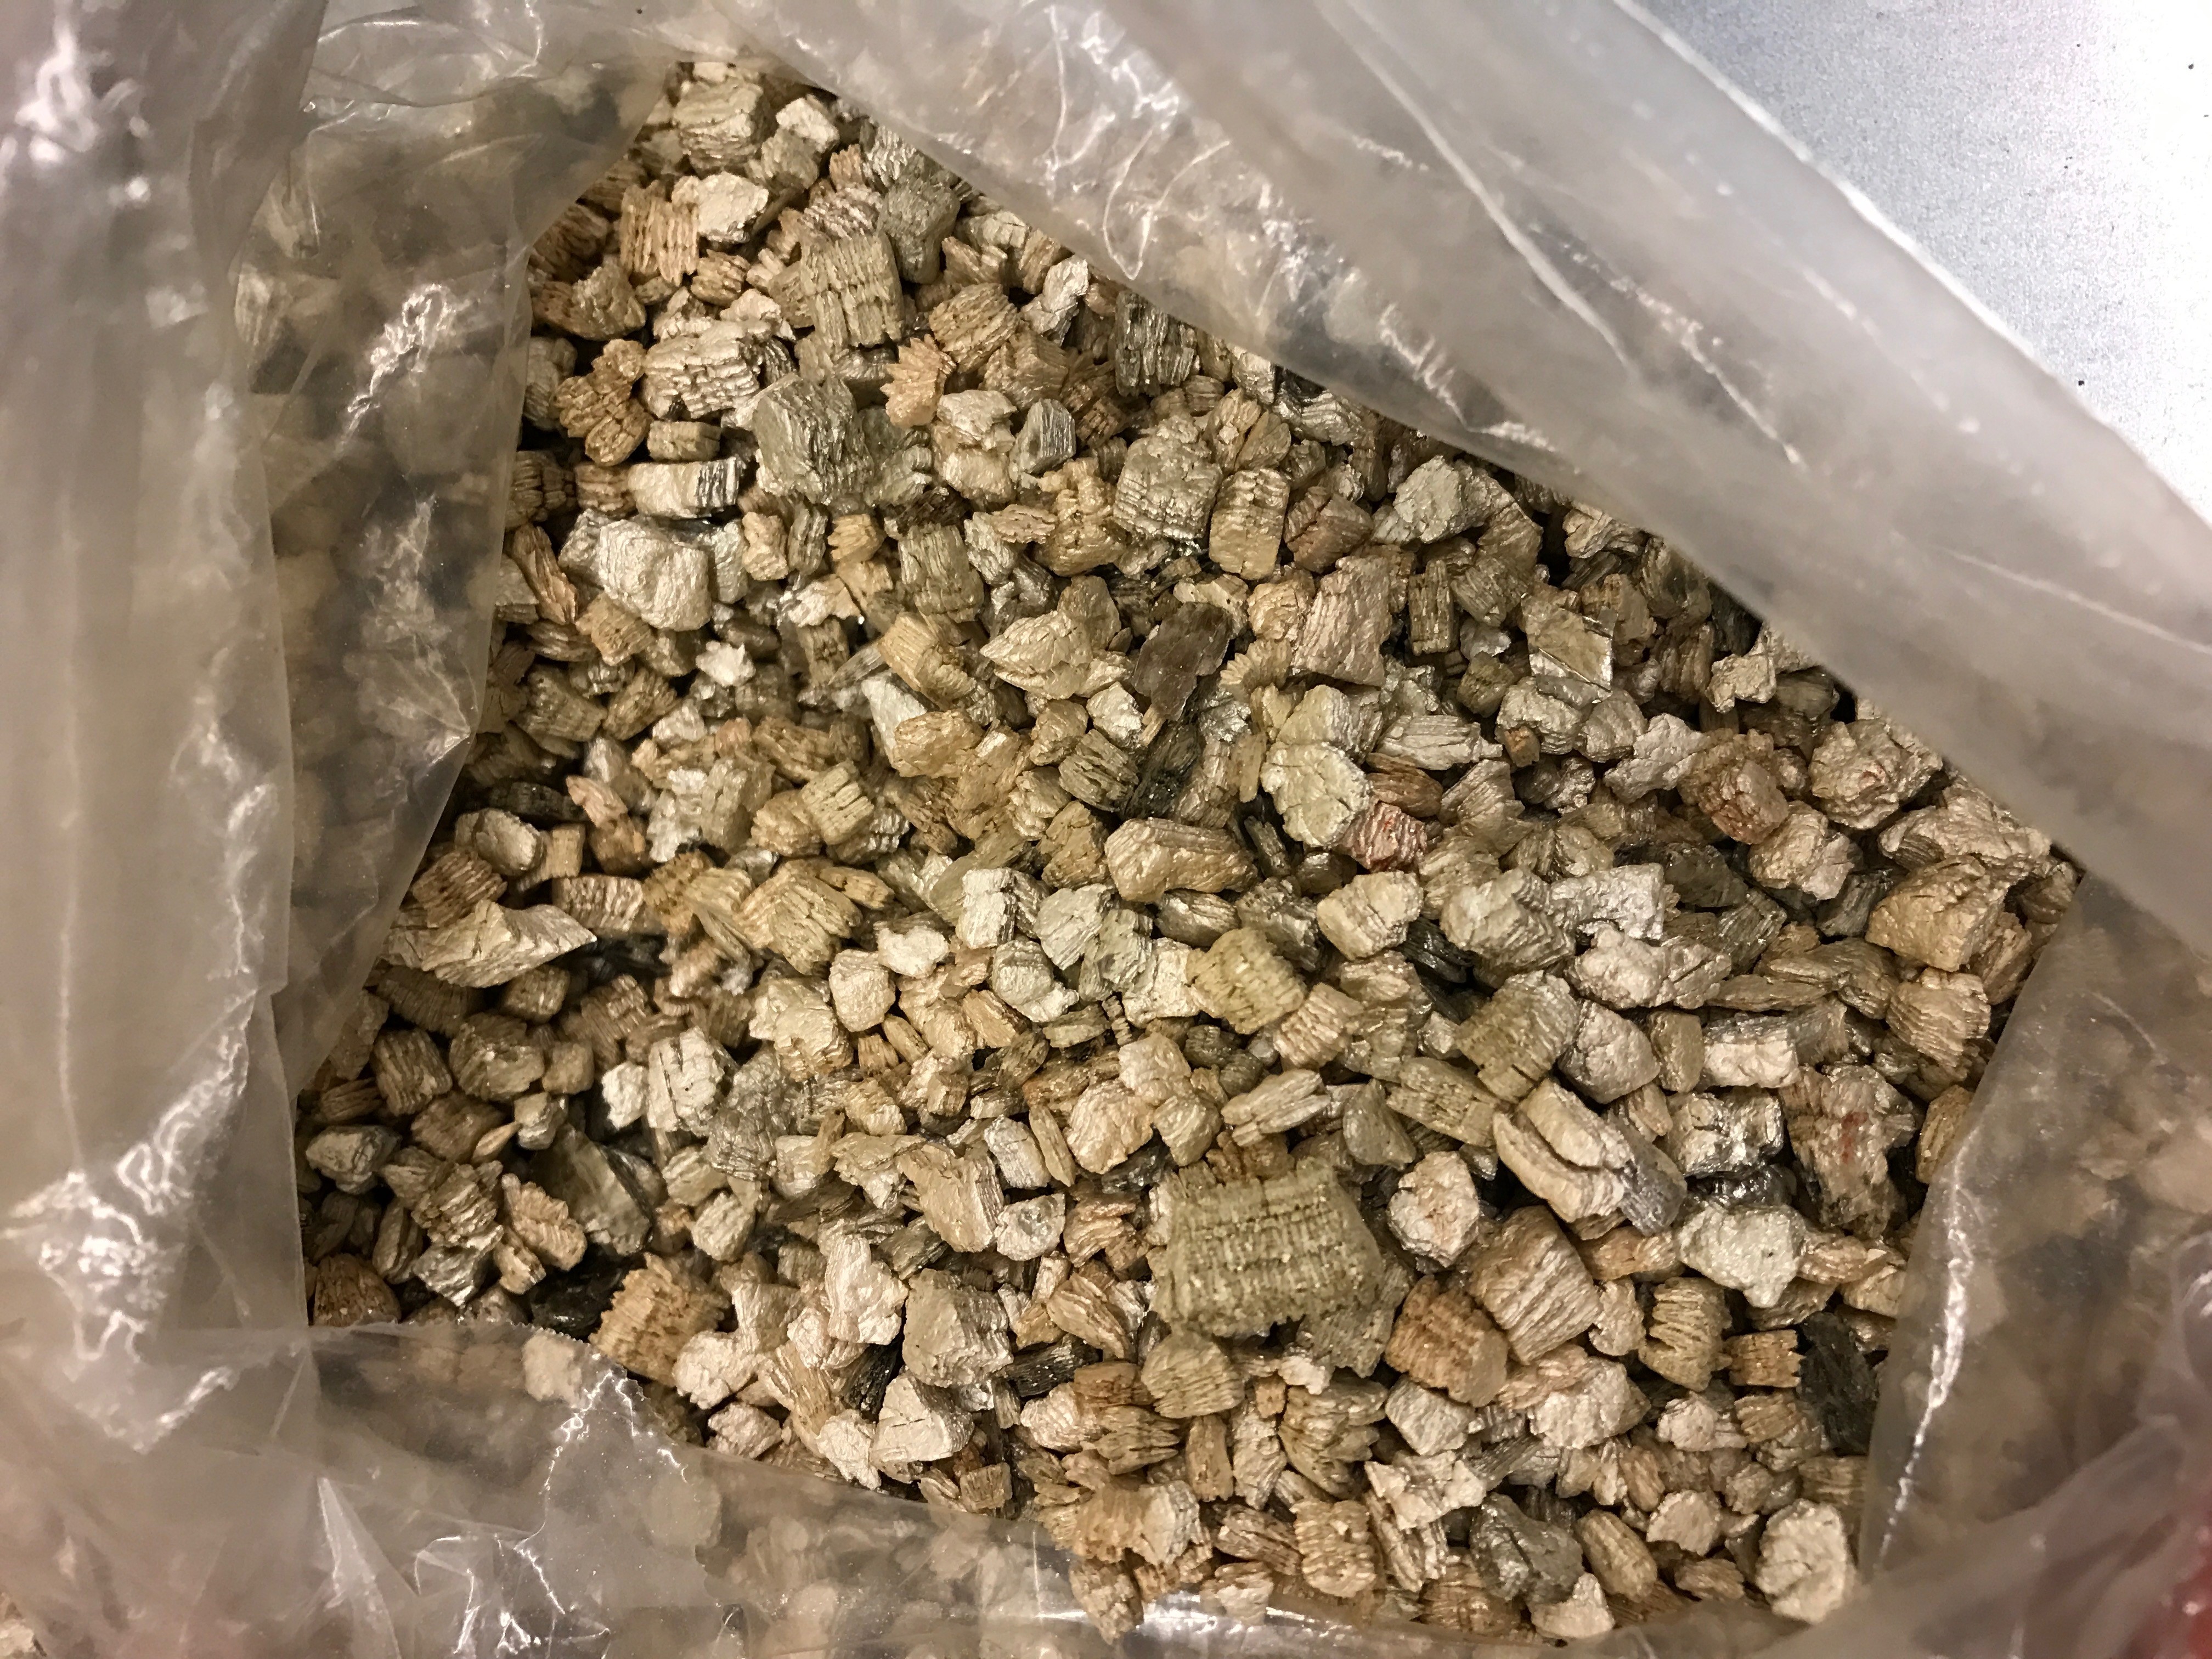
All of our Gas Log Sets come with two bags with stones and embers.
The large bag contains a simulation of stones made out of a foamy material, which you can place on the burner.
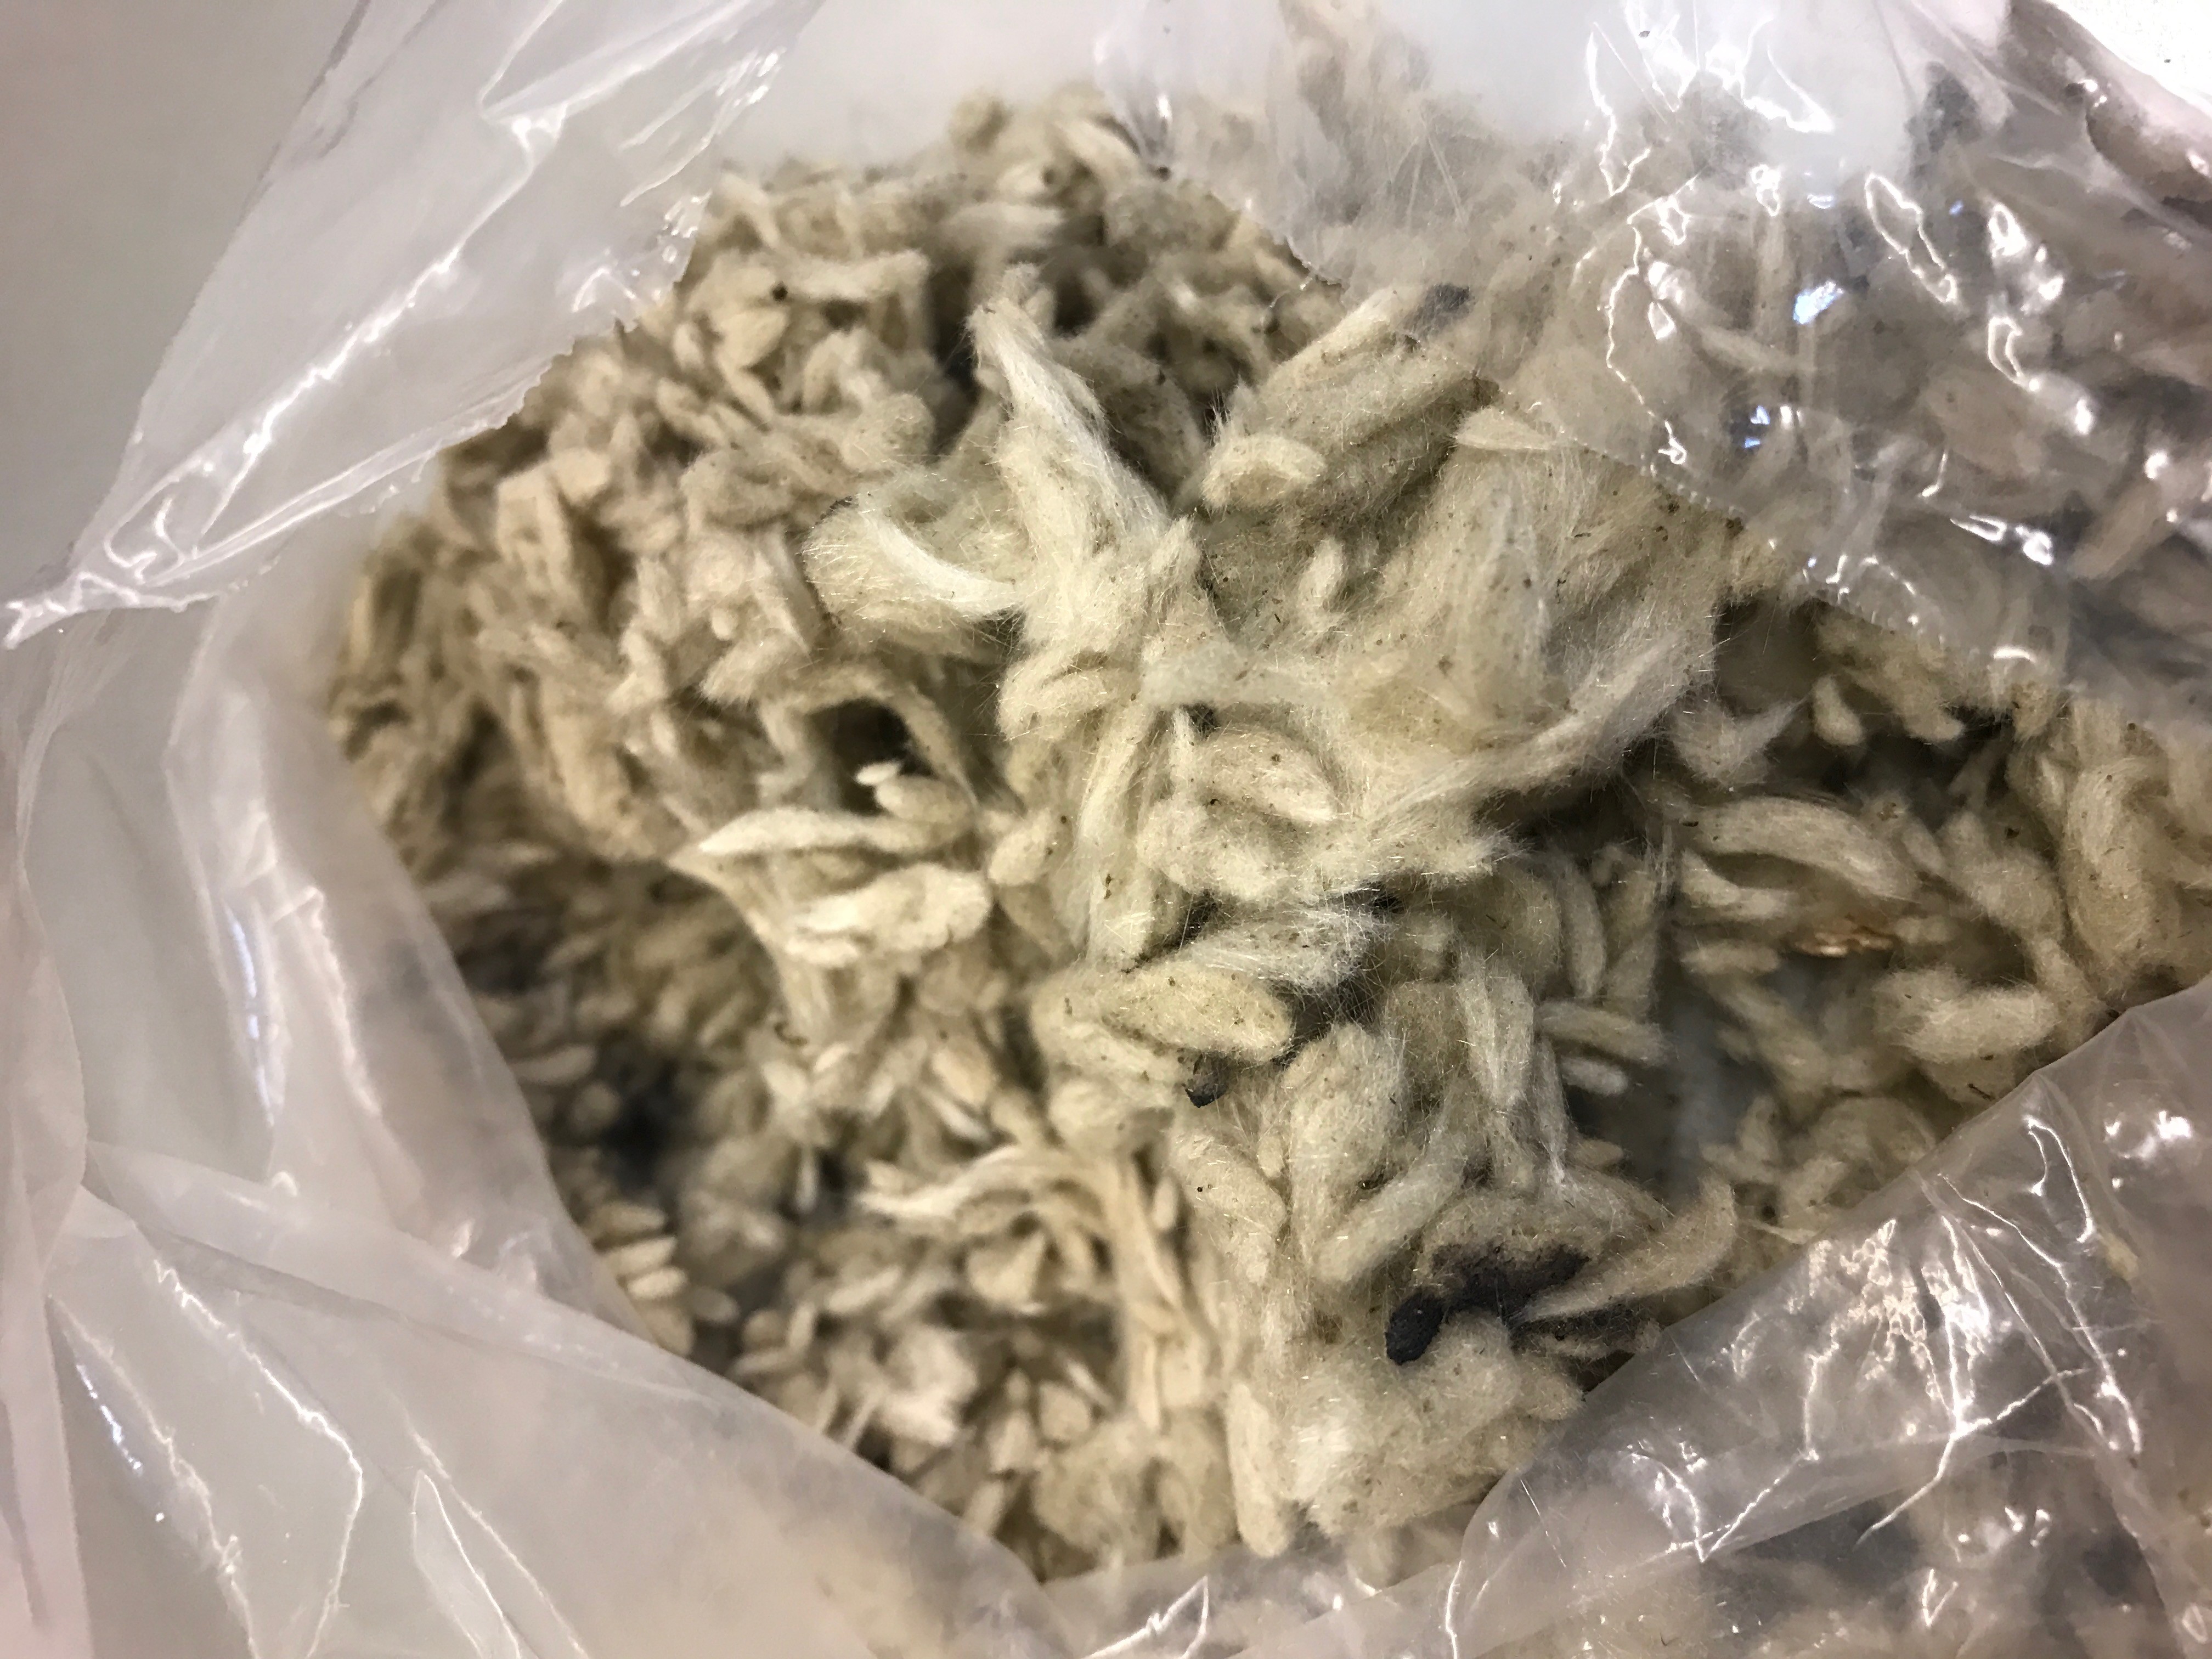
The smaller bag contains a material very similar to cotton. These are glowing embers.
The stones can be placed as you prefer but you need to follow these clearances.
You CAN NOT place anything in front of the gas log closer than 5 Inches.

We recommend you place the stones on the front tray of the unit as shown in the picture below.
Now, you will place the glowing embers covering the front burner, as shown below.
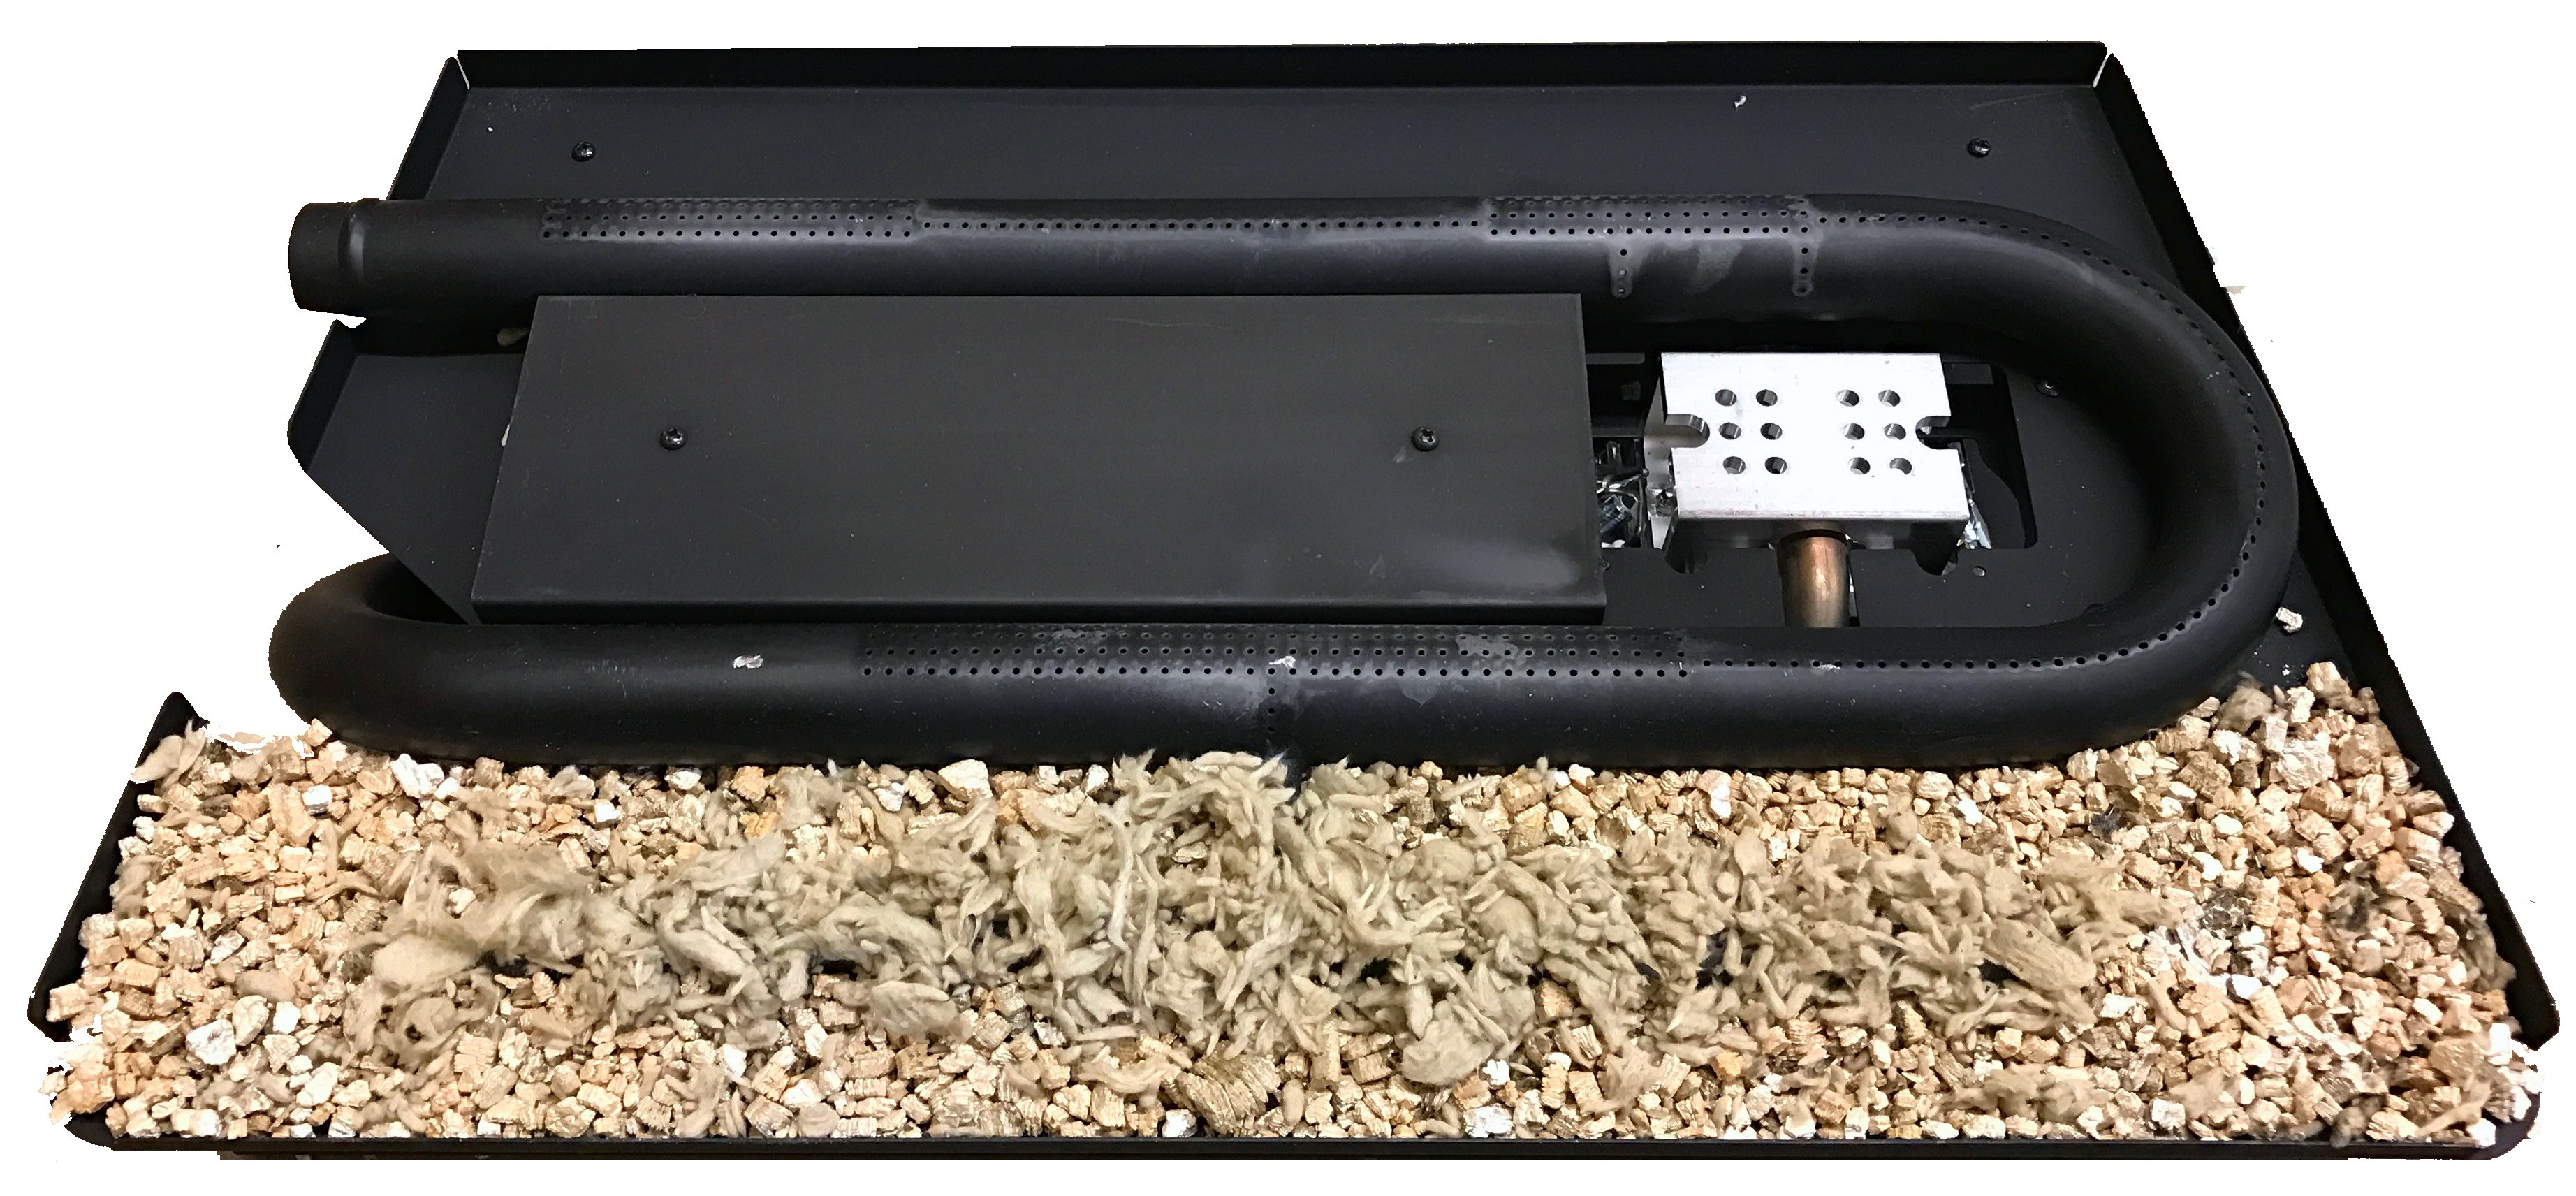
The embers help create the look of smoldering wood embers. A simple solution to giving your fire a beautiful and more natural look, when the flames from your fire hit these embers, they glow red like real wood. These are non-consuming, so they can be lit and re-used many times.
After you set everything it should look similar to the picture below.
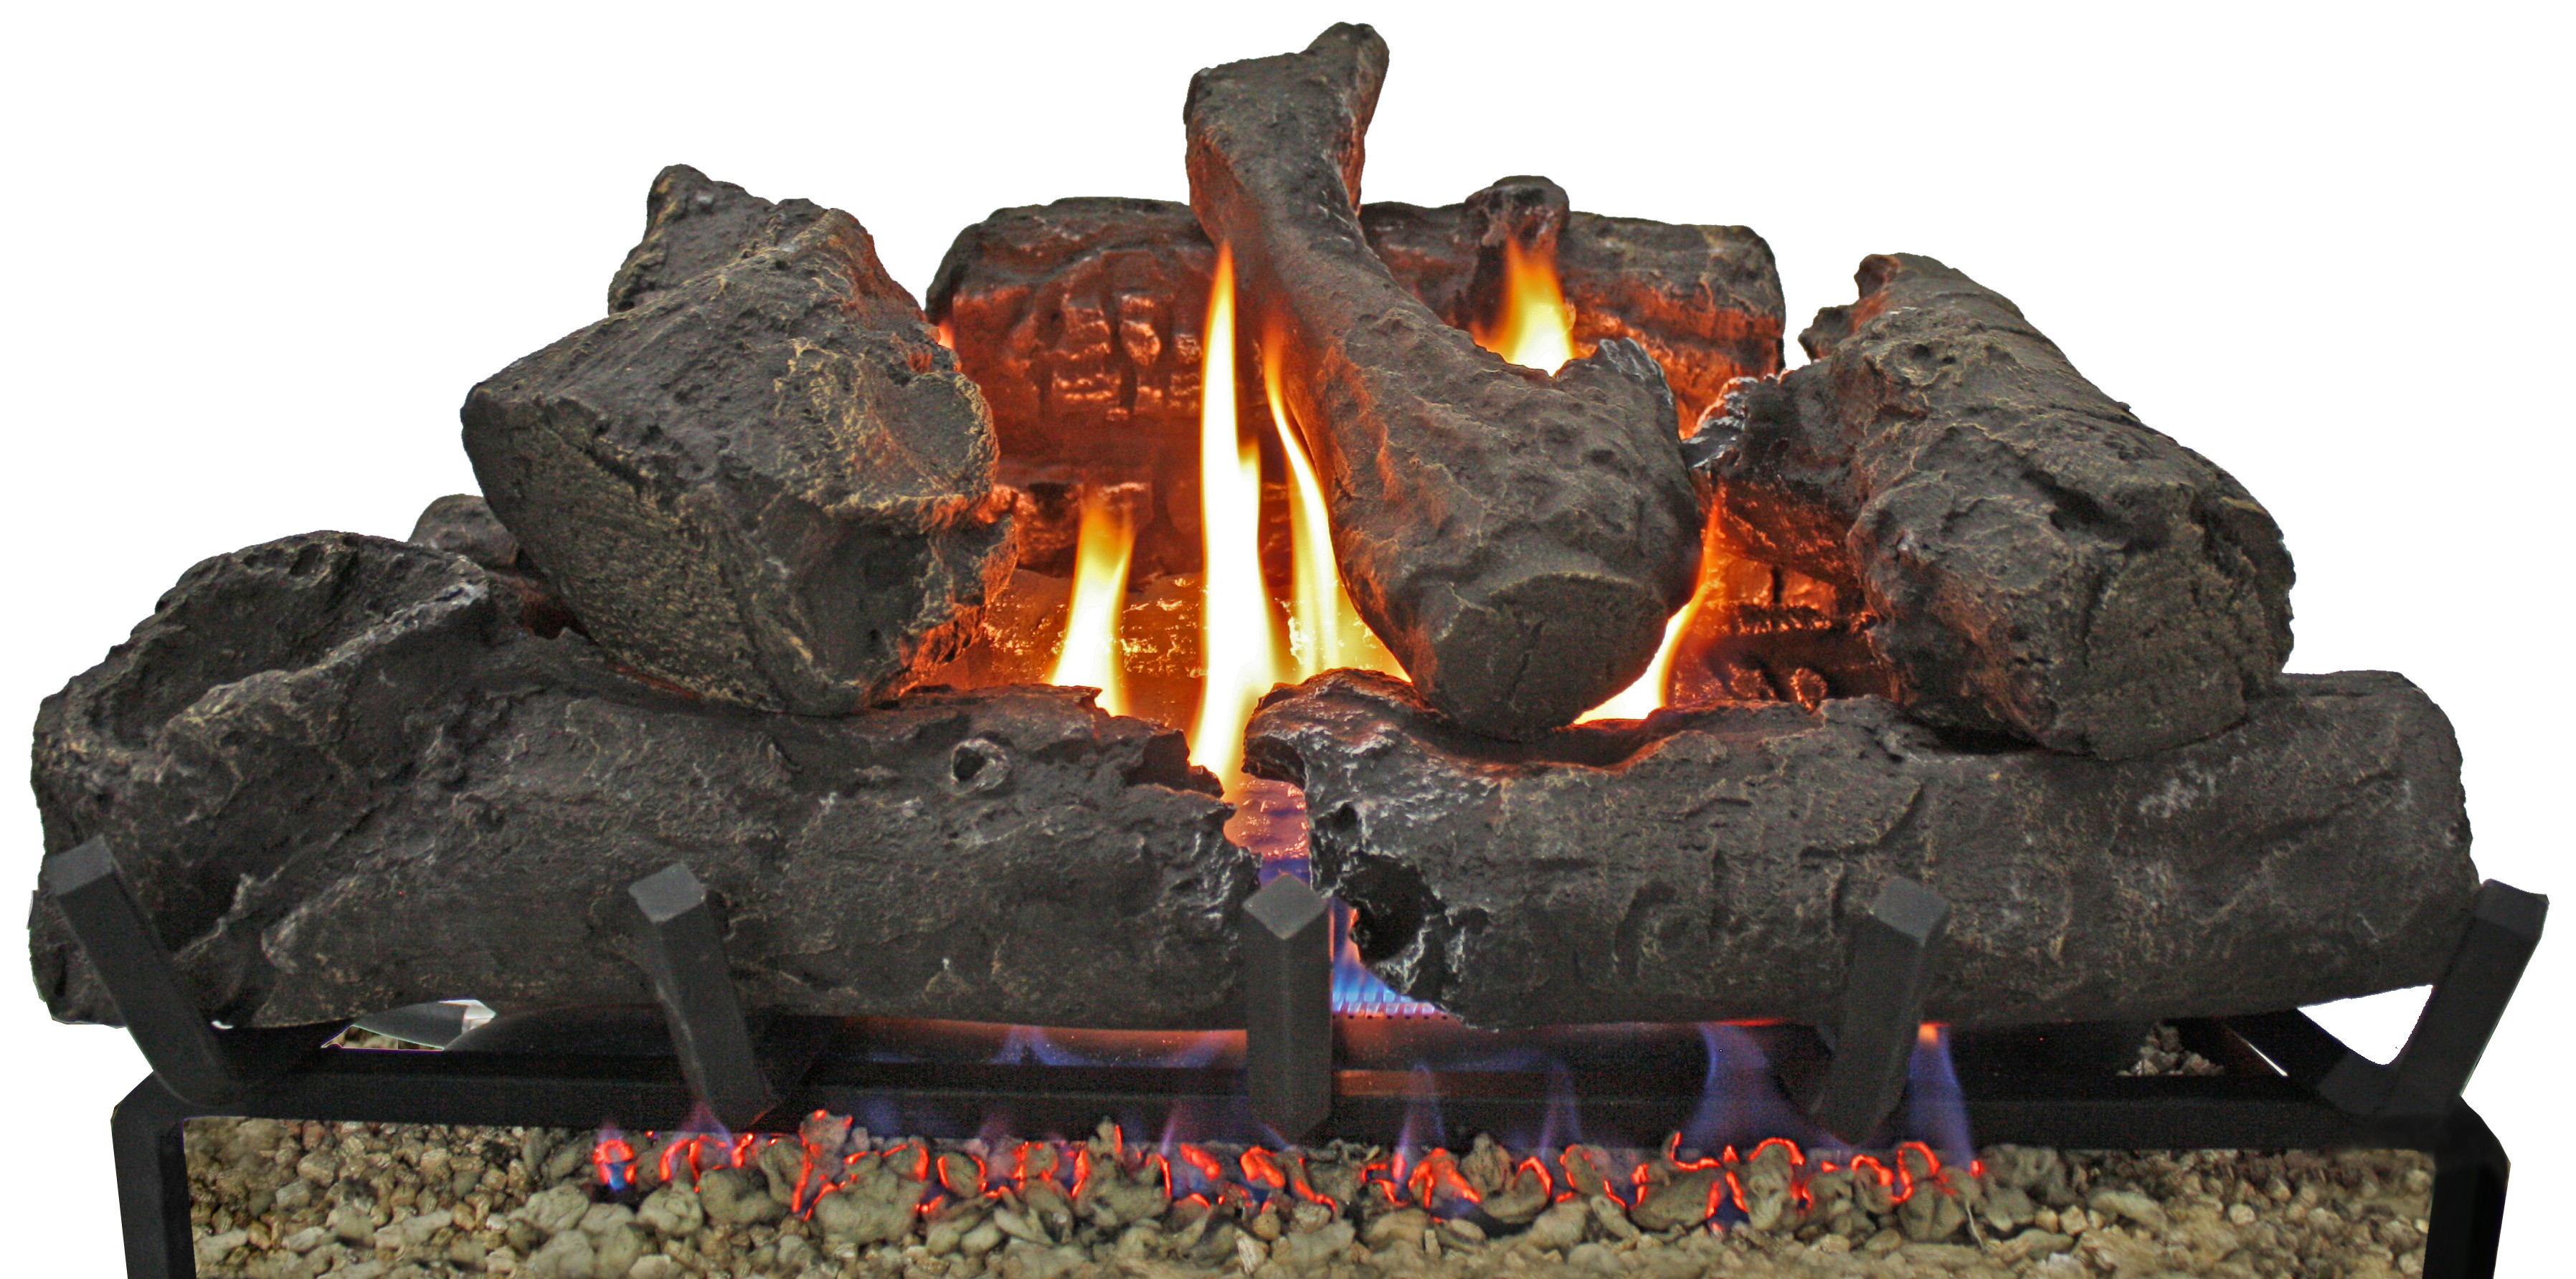
Keep in mind, the stones and glowing embers are intended for decoration and are meant to be placed as the customer sees fit as a personal touch.
If you would like some guidance on the placement. please reach out to us to discuss further at 877-670-8428 or service@thermablaster.com.
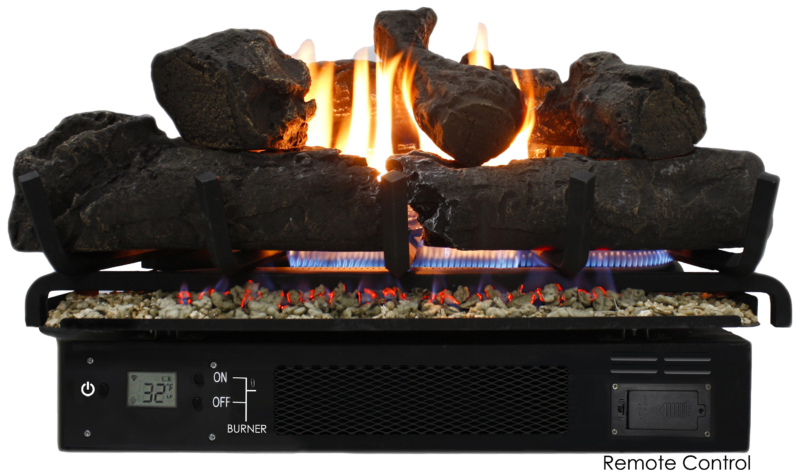
Thermablaster Remote log sets come with a wireless remote control that is synchronized with the log set at the factory. The installer must verify installation and synchronization of the remote control. This remote has an onboard thermostat that senses the temperature at the location of the remote. Please consider the location when mounting the remote as this will determine how much heat is put into the room. The remote can be used adjust the target temperature, gauge current temperature and turn the log set completely off. For best performance, we recommend that the remote has a direct line of sight with the log set and is positioned within 10 feet. Please note for safety reasons you cannot start the log set from the remote. Initial lighting of the logs must be done at the front of the unit. Once lit the logs will cycle between pilot and burner by using the remote control.
Remote Control Operation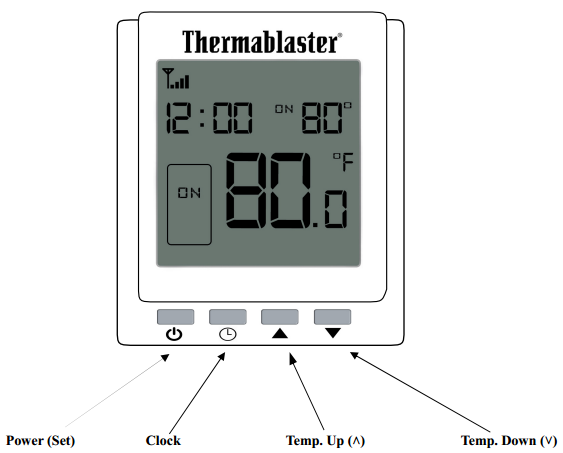
Power (Set): Holding the Power button allows you to only shut OFF the whole system when depressed. By adjusting the temperature, you can cause the burner to turn on and off based on the necessity for more or less heat to be provided. To manually activate or turn off the burner, you must use the control at the log set itself.
Clock: Button will set the time on the remote control
- Depress clock button until time is blinking.
- Use Up (˄) and Down (˅) arrows to set hours on the remote control
- Once hours are set, press the clock button and the minutes field will appear as blinking. Use the arrows to adjust minutes.
Note: When desired time is set, no further action is necessary
Up (˄) and Down (˅): These buttons will allow you to set the heat to your desired temperature. You can also turn on and off the main burner by adjusting temperature, provided the unit was initially ignited at the front of the logs.
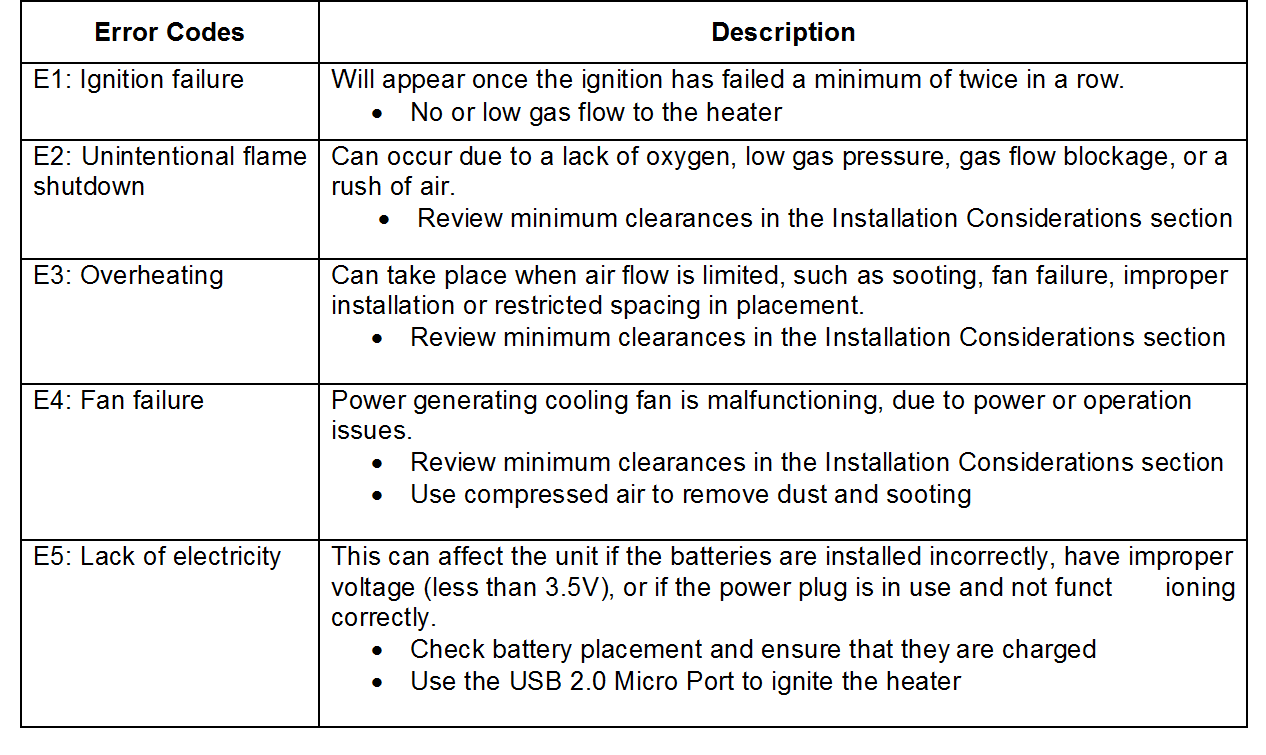
Remote Error Codes
Remote Synchronization
Your remote is synchronized at the factory. This step should not be necessary upon purchase, however your installer should verify remote operation and synchronization during installation. If for whatever reason, the remote and unit are not synchronized then the following steps below will be needed for proper remote operation. If you feel this step might be needed, please call our customer service first for help at 1-877-670-8428
- To synchronize the remote control and the gas log heater, keep the remote control on OFF setting (the screen will show OFF). Simultaneously depress Clock and Down (˅) until the remote control shows “Cd” on the screen.
- On the unit’s front control panel, press down the Power Button to turn the unit ON, wait 10 seconds, then press down the Power Button again to power OFF. The screen will show OFF. Quickly depress and hold the Burner ON and OFF buttons simultaneously until the screen shows “Cd”
- Press Clock on the remote control. If the remote control and gas log control shows “Ed” simultaneously, they are synchronized.
- Simultaneously depress Down (˅) and Clock on the remote control to exit the synchronization.
- Now the remote control and gas log control are successfully synchronized.
Set to ℃ or ℉:
- ℃ refers to Centigrade. ℉ refers to Fahrenheit.
- Set the remote control to OFF (the screen will show OFF).
- Press Up (˄) and Down (˅) simultaneously. When the temperature icon flashes, press Up (˄) or Down (˅) to choose the temperature unit. The setting will be saved and exit automatically after a short time, or you can exit immediately by pressing Clock.
- Default setting: ℉
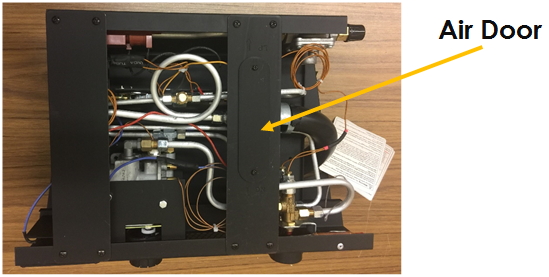
How to switch the Air Door from Propane to Natural Gas
Setting the Air Door to the appropriate gas type being supplied to the log set is important, as it improves the color and appearance of the flame. The Air Door is located on the bottom of the log set heater. So, you will need to flip it over. I recommend laying a cloth down so that the metal of the burner does not rub on the floor. You will want to look for an oval shaped cover that has two screws.
You will unscrew this door, revealing a silver cylinder shaped part that has a single screw. The unit comes preset for Propane, so at first, the screw will be facing towards LP (Liquid Propane).
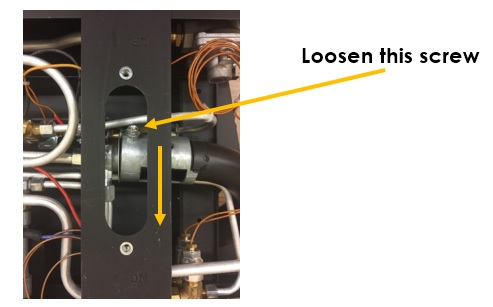
Loosen this screw.
Then, with your screwdriver still contacting the screw, slide/rotate the cylinder towards the NG (Natural Gas) side, until it cannot slide any further.
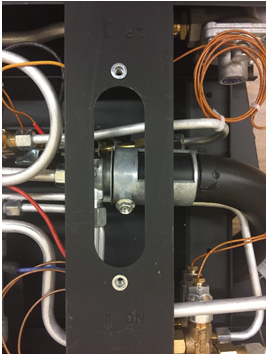
Once done, you will tighten the screw on the cylinder, then seal the air shutter cover again.
For more information, you can contact us at 877-670-8428 or via email service@thermablaster.com.
